Wired vs Wireless In-Ear Monitors For Live Performance

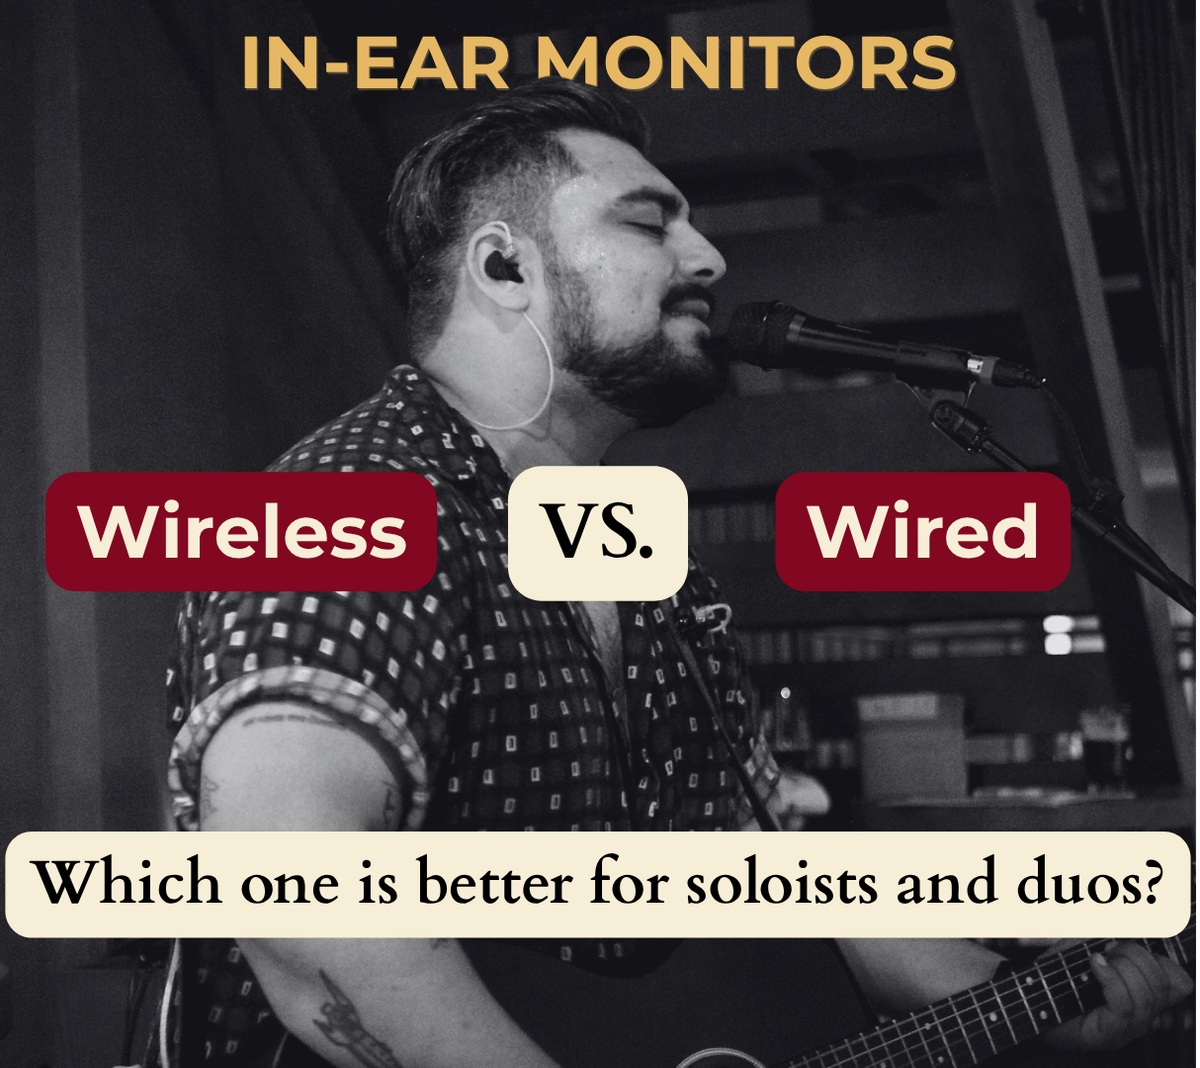
Vietnam is the one country I've performed at where you cannot take the house system for granted. New venues that I show up to either have a pristine Electro-Voice Evolve 70, or a crapped out Nanomax karaoke machine doubling as a PA for this special occasion.
Whether due to high ambient noise or terrible speakers, relying on venue monitors, or not having monitors at all, is the fastest way to ruining your voice and delivering a sub-par experience for the audience.
But if you look up "in-ear monitor setups" online, most guides push expensive, $800+ wireless rack systems that must be 5.8Ghz or are completely useless.
Here’s the problem with that argument: you do not need expensive wireless gear to get a crystal-clear stage mix.
A simple, wired in-ear monitor (IEM) setup gives you 100% control over your volume, zero wireless dropouts, pristine audio clarity, and costs a fraction of a typical wireless unit. Today, we’re breaking down the ultimate budget IEM setup for solo performers, duos, and trios, step-by-step.
Wired vs. Wireless IEMs: Why Wired Wins for Small Stage Rigs
Before buying gear, it’s essential to weigh the realities of wired versus wireless in-ear monitoring on small-to-medium stages.
| Feature | Budget Wireless Systems ($150 - $400) | Wired Bodypack System ($40 - $100) |
| Signal Reliability | High risk of RF interference & dropouts | 100% reliable (physical cable connection) |
| Audio Quality | Compressed digital/analog wireless signal | Uncompressed, studio-grade audio |
| Batteries | High power consumption (transmitters + receivers) | Long battery life (or passive AAA power) |
| Cost | Expensive for true pro-grade stability | Extremely affordable |
| Mobility | Complete freedom of movement | Tethered by a lightweight headphone cable |
For solo guitarists, keyboardists, acoustic duos, and small acoustic trios who stay relatively stationary around their microphone stands, a wired IEM system is superior in almost every category. You get bulletproof signal stability and pristine audio quality for less than the cost of a single pedal.
The Core Budget Setup: What Gear Do You Need?
To set up a complete wired rig, you only need four core components:
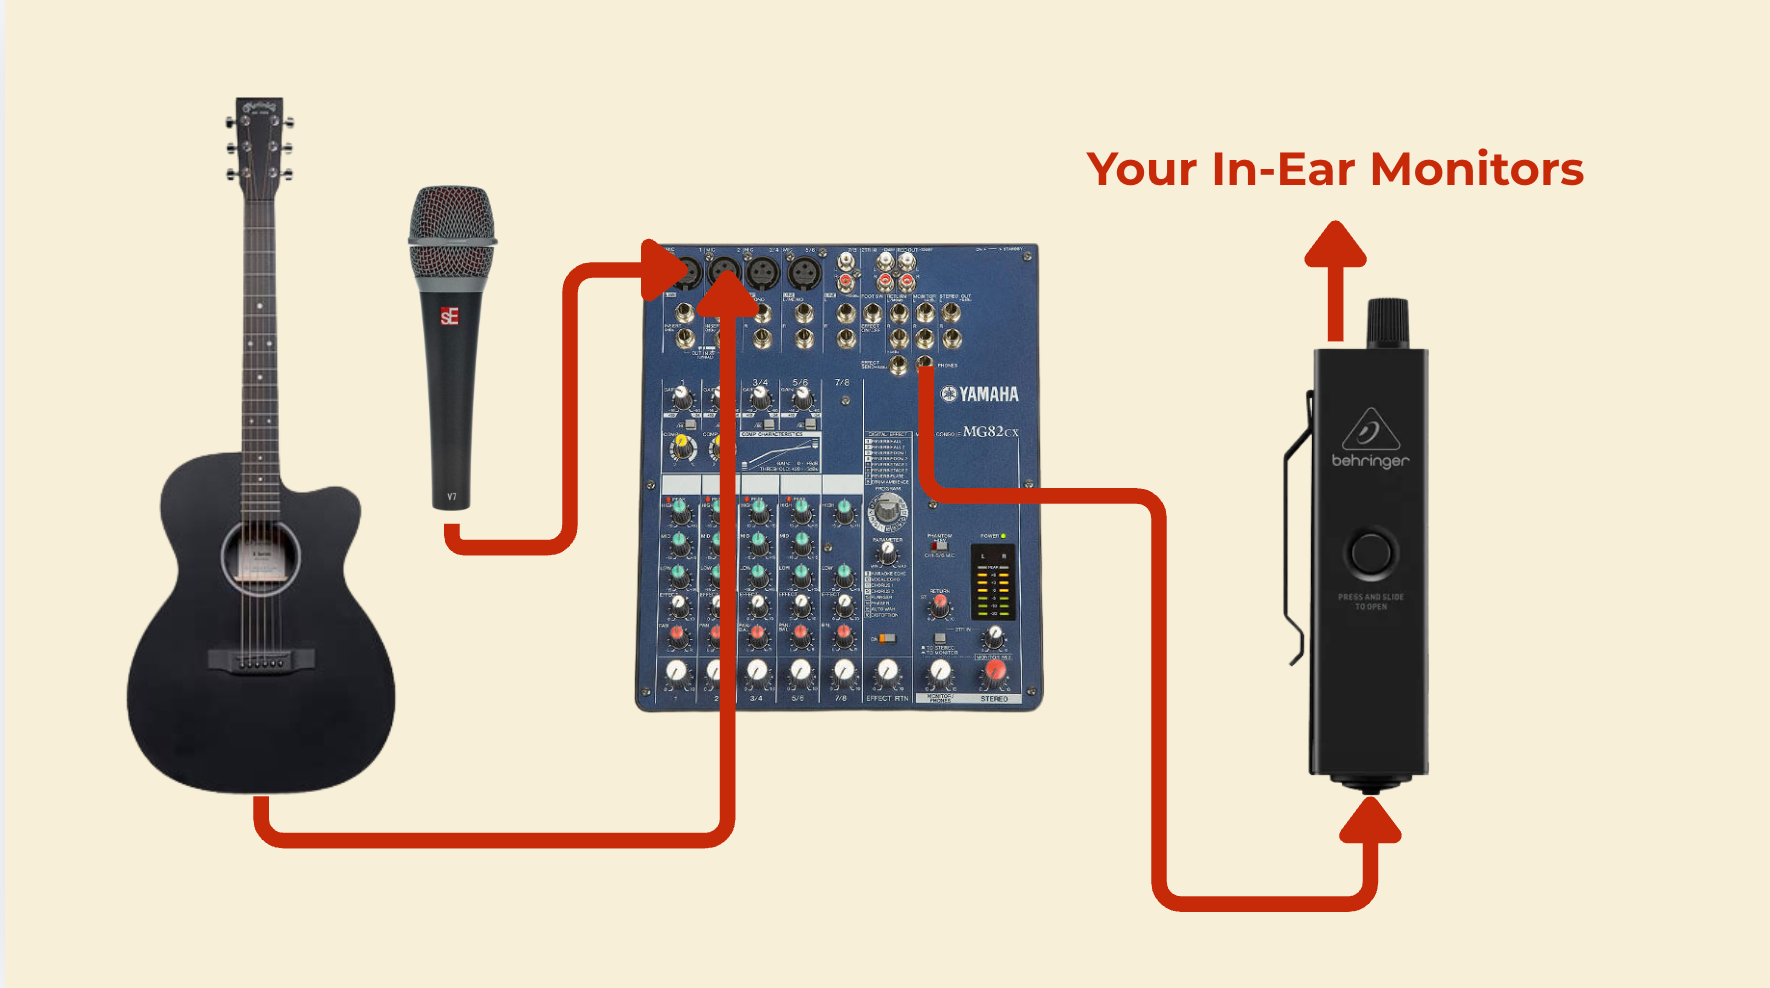
1. The Brain: Behringer Powerplay P2 (or P1)
The heart of a budget wired rig is a compact, belt-worn personal monitor amplifier.
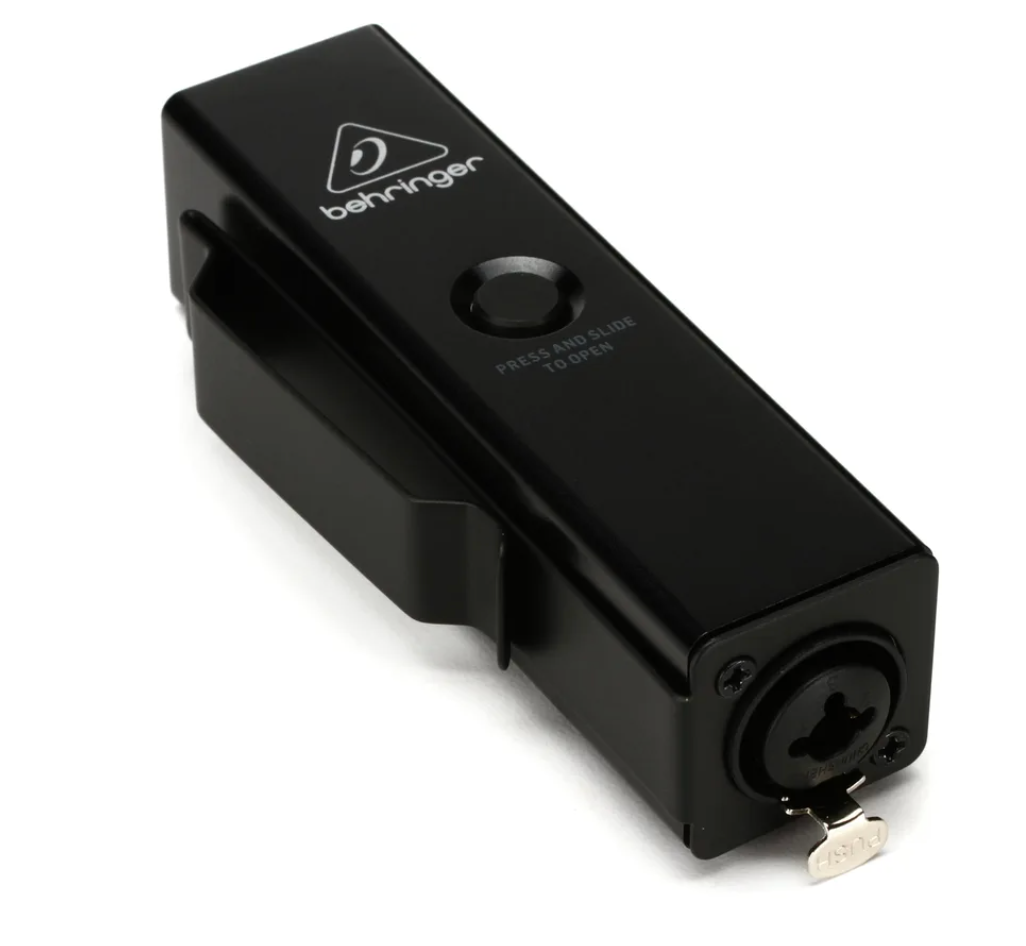
- Behringer Powerplay P2: The gold standard for budget gigging. It runs on two AAA batteries, clips directly to your belt, and features a combined XLR/TRS input jack on the bottom with a built-in volume knob and stereo/mono switch inside. I would use XLR just to avoid accidentally pulling the cable out the monitor.
- Behringer Powerplay P1: If you want dual inputs (to mix two separate mono feeds—like your instrument and vocals—independently on your hip), the slightly larger P1 features two XLR inputs and can run on a 9V battery or external power adapter.
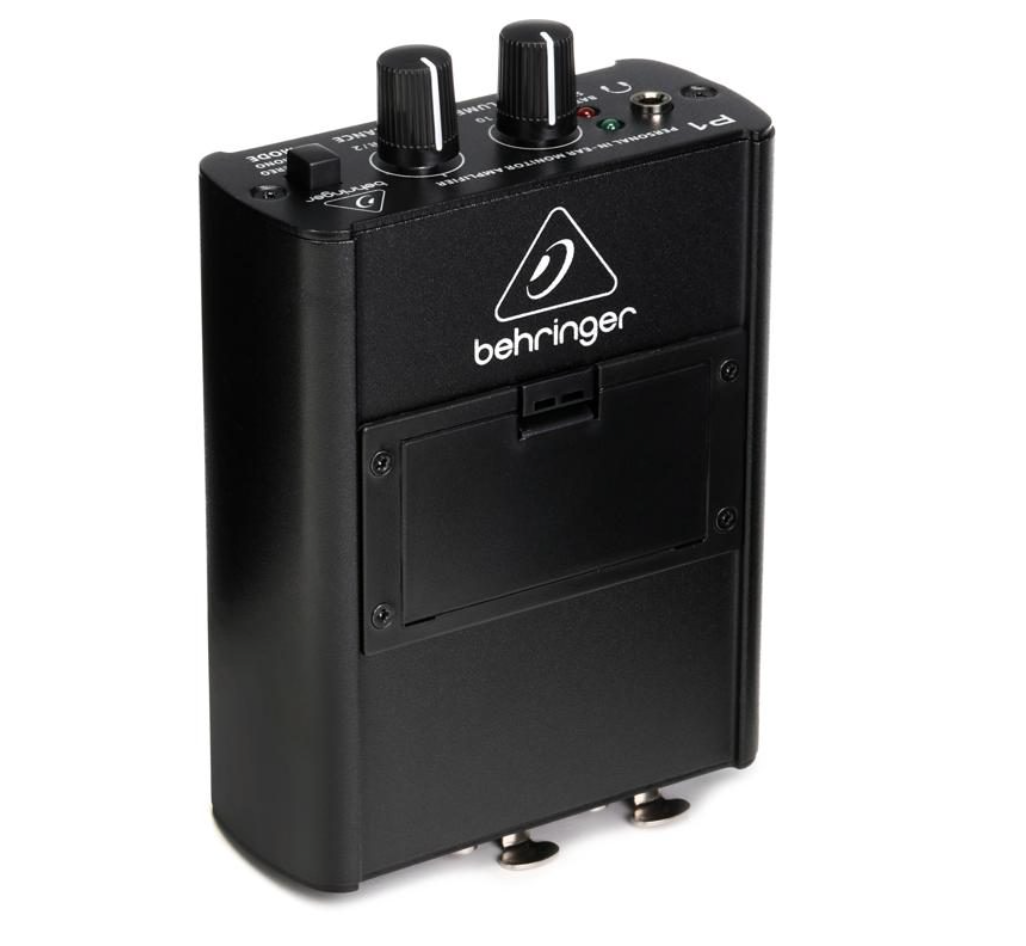
Behringer PowerPlay P1
For mixing two sources, like guitar and vocals, or backing tracks.
2. The Earbuds: Studio-Quality IEMs
You need dedicated dual-driver or multi-driver wired IEM earbuds with noise-isolating silicone or foam tips. Models like the KZ ZSN Pro, KZ ZS10 Pro, or entry-level Shure SE215 deliver deep bass response, crisp vocal clarity, and up to 26dB of passive stage noise isolation. They're also great for just listening to music.
3. Essential Adapters
Keep a couple of 1/4" TRS to 1/8" (3.5mm) stereo adapters and a standard XLR female to 1/4" TRS cable in your gig bag. Venue mixing boards and auxiliary outputs come in all shapes and sizes, and having these adapters ensures you can connect to any sound system seamlessly.
Step-by-Step Signal Routing: How to Connect Your Setup on Stage
Setting up your budget IEM rig takes less than two minutes during soundcheck. Here is how to route your signal depending on your stage setup:
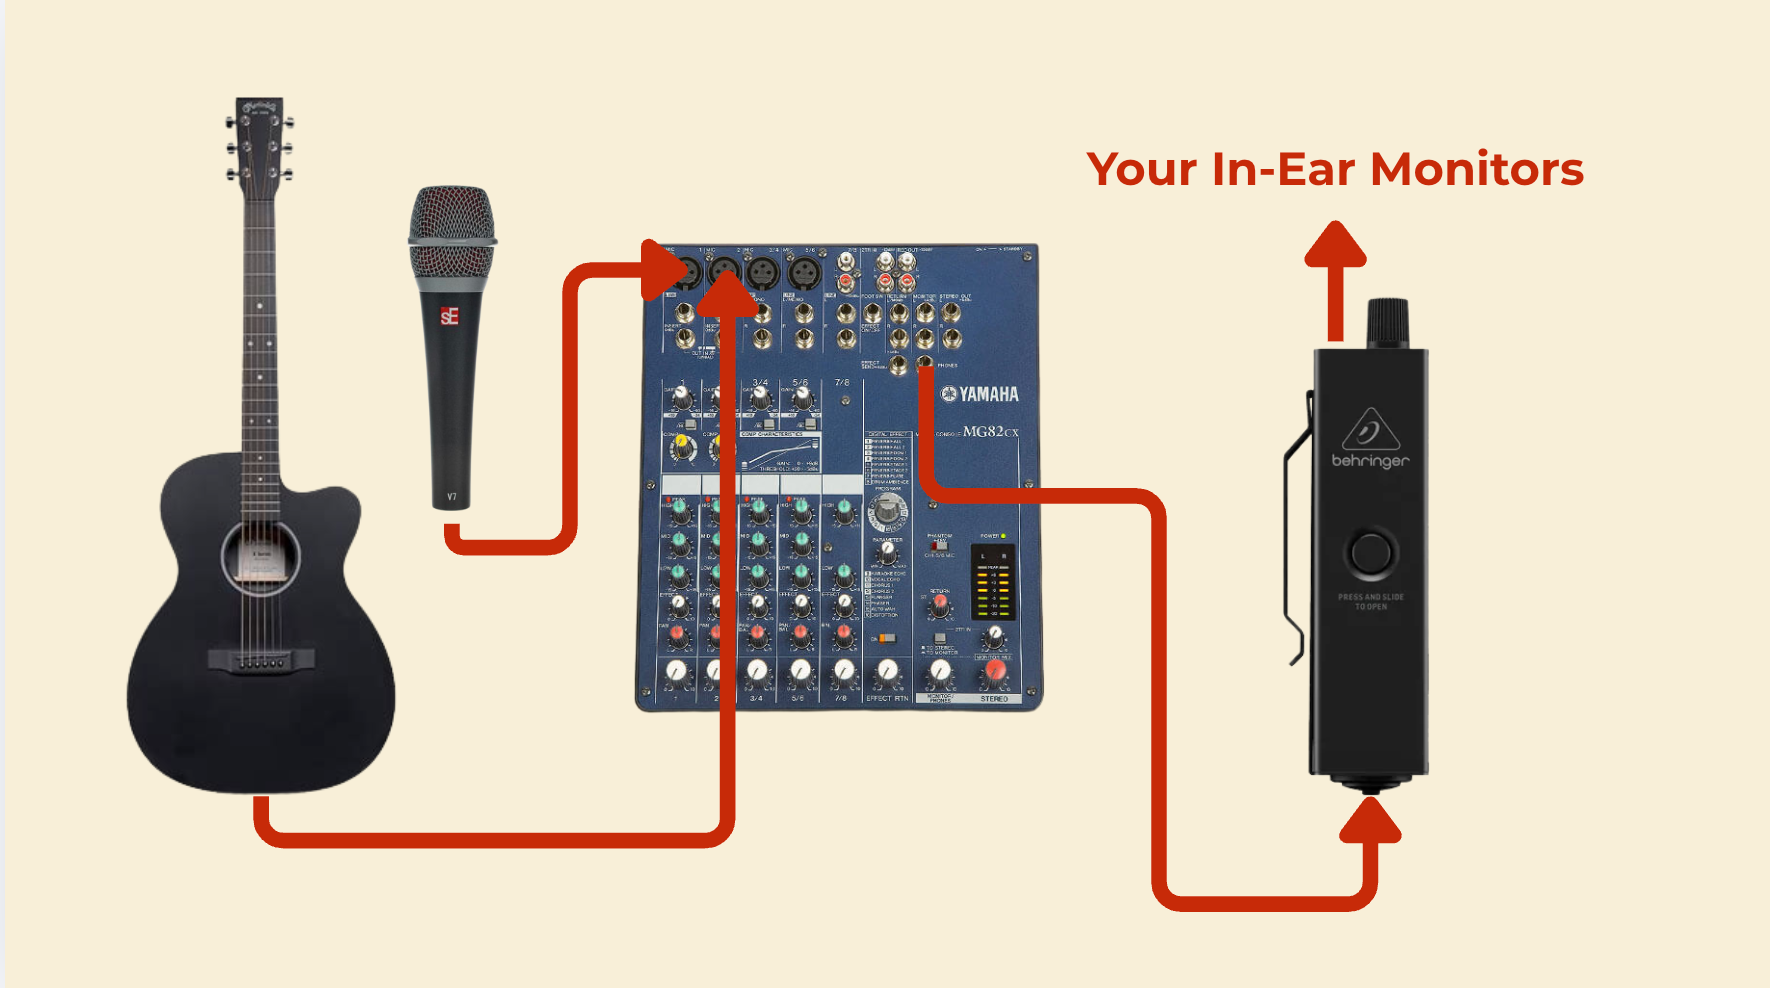
Option A: Feeding from a Venue Soundboard (Aux Feed):Best when a sound engineer is running the house PA system.
- Ask the sound engineer for an Aux Send (Monitor Out) line from the main mixing console.
- Plug an XLR cable (or 1/4" cable) from the venue's monitor output directly into the bottom input of your Behringer Powerplay P2.
- Set the P2 internal switch to Mono (since most venue aux sends are mono).
- Plug your IEM earbuds into the top 3.5mm headphone jack, turn the volume knob to zero, insert your ears, and slowly dial up your volume to a comfortable level.
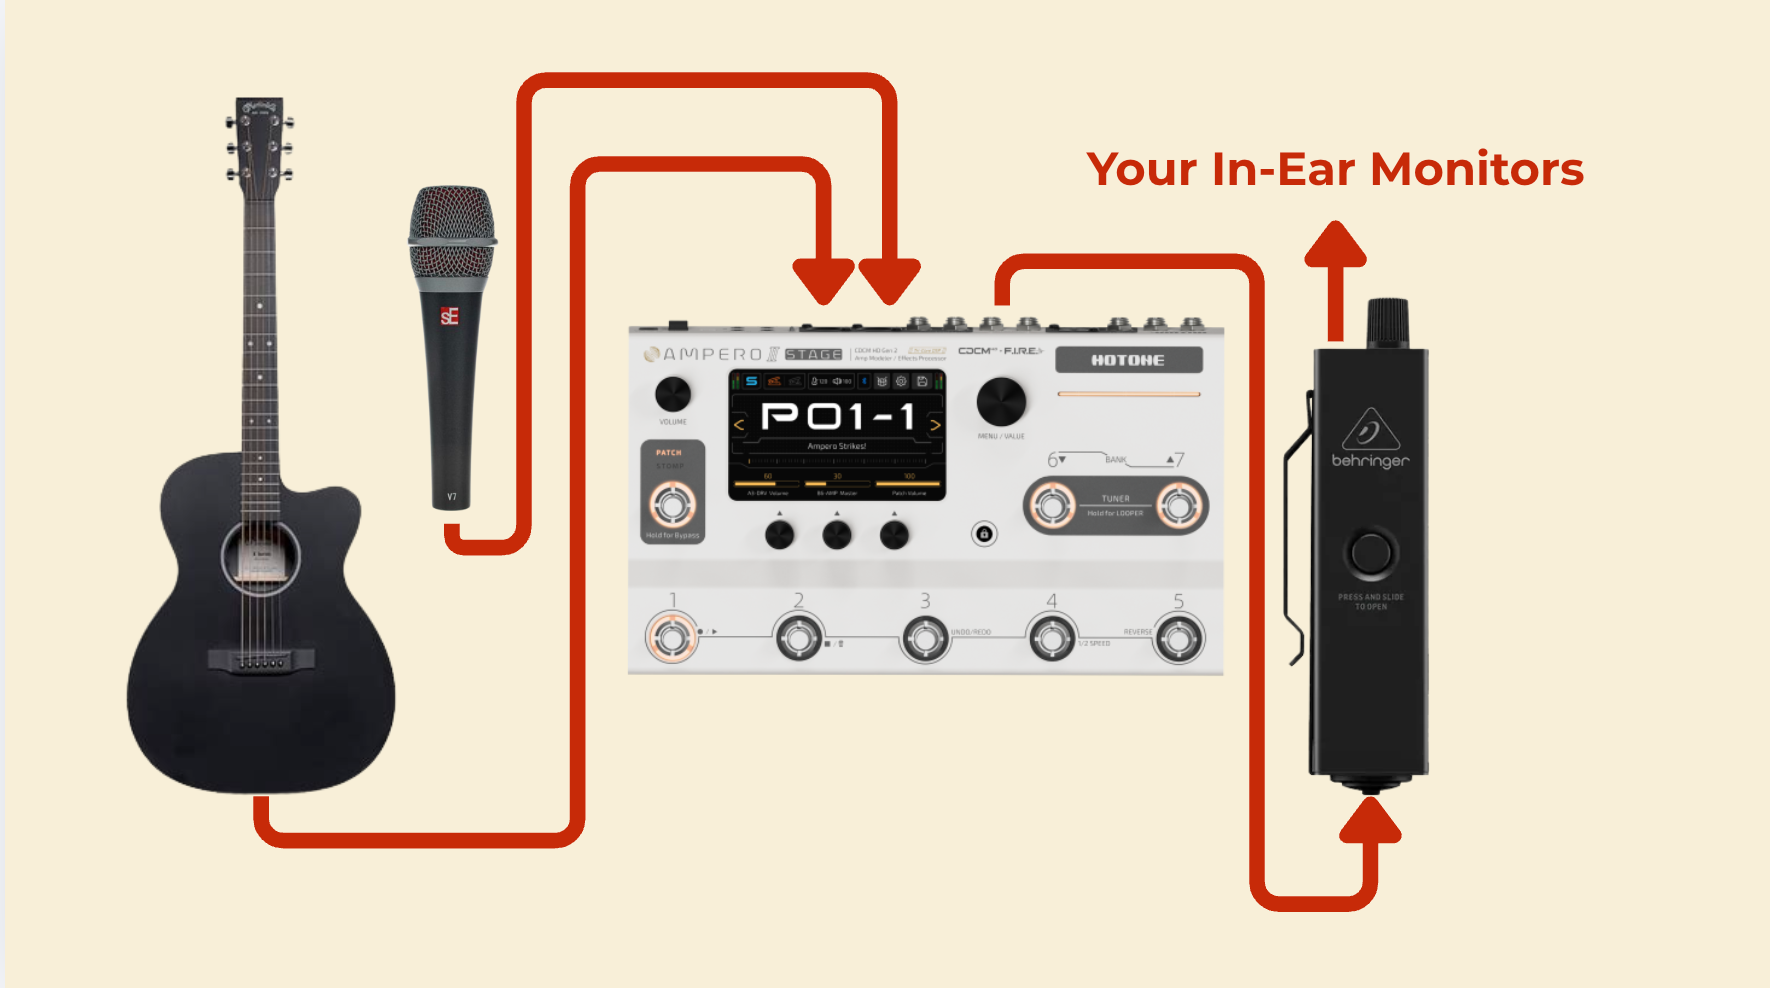
Option B: Feeding from Your Own Multi-FX / Pedalboard:Best for self-contained solo setups without an external engineer.
- If you use a modern multi-FX pedal (like a Hotone Ampero II Stage, HeadRush Core, or Line 6 Helix) with dual outputs, route Output 1 (XLR) to the main house PA.
- Plug a 1/4" TRS headphone cable from Output 2 (or the dedicated Phones jack) straight into your Behringer P2 on your belt.
- Adjust your internal pedalboard mixer blocks to dial in the perfect blend of your vocal mic and acoustic guitar IR directly in your ears.
Scaling Up: Wired IEM Systems for Duos & Trios
Wired IEMs aren't just for solo acts. If you perform in an acoustic duo, trio, or small ensemble, you can scale this exact wired setup without adding expensive wireless transmitters or cluttering the stage with multiple wedge speakers.
Here are the two best ways to expand wired in-ears for small arrangements:
1. The Multi-Channel Aux Routing Method (Individual Mixes)
If your duo or trio carries a small digital mixer (such as a Behringer XR12/XR18, Soundcraft Ui16, or Zoom LiveTrak), every member can get their own custom monitor mix.
- How it works: Each performer wears their own Behringer P2 on their belt. Run an XLR cable from Aux 1 to Performer A's beltpack, Aux 2 to Performer B, and Aux 3 to Performer C.
- The Benefit: The lead vocalist can hear more of their voice, the acoustic guitarist can bump up their guitar level, and the cajón/percussion player can hear a mix heavy on rhythm—all controlled independently via a smartphone app.
2. The Headphone Amp Rack Method (Shared/Budget Trio Mix)
If you are playing venues with simple analog mixers that only have one or two Aux outputs, you can share a central headphone amplifier placed near your stage sub-snake.
- The Gear: A rackmount or desktop 4-channel headphone amp (like the Behringer HA400 or Behringer AMP800).
- How it works: Run a single Aux monitor line from the mixer into the main input of the headphone amplifier. Run individual 15ft stereo headphone extension cables directly from the amp's headphone outputs to each performer's ears.
- The Benefit: Everyone gets a shared monitor mix with individual volume knobs at the central unit. This eliminates battery management completely and keeps gear costs under $150 total for an entire 3-piece band.
Estimated Cost & Gear Breakdown by Arrangement
Here is the exact shopping list, estimated price range, and required hardware for each performance configuration so you can budget accurately before heading to Sweetwater.
1. Solo Performer Setup
- Estimated Total Price: $90 – $180
- Target Scenario: Single vocalist/guitarist or keyboardist plugging into a house PA or pedalboard.
| Product | Required Qty | Estimated Unit Cost |
| Behringer Powerplay P2 Personal Monitor Amplifier | 1 | ~$30 – $40 |
| Shure SE215 (or KZ ZS10 Pro) In-Ear Monitors | 1 | ~$50 – $100 |
| 15 ft 3.5mm Headphone Extension Cable | 1 | ~$10 – $15 |
| 1/4" TRS Male to 1/8" TRS Female Adapter (2-Pack) | 1 | ~$8 – $12 |
| 15 ft XLR Male to XLR Female Cable | 1 | ~$12 – $18 |
2. Duo Setup (Individual Monitor Mixes)
- Estimated Total Price: $180 – $360
- Target Scenario: 2 performers requiring independent volume and monitor feeds from a 2-Aux mixer.
| Product | Required Qty | Estimated Unit Cost |
| Behringer Powerplay P2 Personal Monitor Amplifier | 2 | ~$30 – $40 |
| Shure SE215 (or KZ ZS10 Pro) In-Ear Monitors | 2 | ~$50 – $100 |
| 15 ft 3.5mm Headphone Extension Cable | 2 | ~$10 – $15 |
| 20 ft XLR Male to XLR Female Cable | 2 | ~$15 – $20 |
| 1/4" TRS Male to 1/8" TRS Female Adapters | 1 | ~$8 – $12 |
3. Trio Setup (Shared Central Mix)
- Estimated Total Price: $210 – $380
- Target Scenario: 3 performers sharing a single Aux send from a basic analog mixer via a central desktop amp.
| Product | Required Qty | Estimated Unit Cost |
| Behringer HA400 Microamp 4-Channel Headphone Amp | 1 | ~$25 – $35 |
| Shure SE215 (or KZ ZS10 Pro) In-Ear Monitors | 3 | ~$50 – $100 |
| 25 ft 3.5mm Headphone Extension Cable | 3 | ~$12 – $18 |
| 10 ft 1/4" TRS Male to 1/4" TRS Male Cable (Mixer to HA400) | 1 | ~$12 – $15 |
| 1/4" TRS Male to 1/8" TRS Female Adapters | 3 | ~$8 – $12 |
4. Trio Setup (Independent Auxiliary Mixes)
- Estimated Total Price: $260 – $520
- Target Scenario: 3 performers using a digital mixer (e.g., Behringer XR18 / Soundcraft Ui16) with 3+ discrete Aux sends.
| Product | Required Qty | Estimated Unit Cost |
| Behringer Powerplay P2 Personal Monitor Amplifier | 3 | ~$30 – $40 |
| Shure SE215 (or KZ ZS10 Pro) In-Ear Monitors | 3 | ~$50 – $100 |
| 15 ft 3.5mm Headphone Extension Cable | 3 | ~$10 – $15 |
| 25 ft XLR Male to XLR Female Cable | 3 | ~$15 – $22 |
| 1/4" TRS Male to 1/8" TRS Female Adapters | 2 | ~$8 – $12 |
Pro Tips for Gigging with Budget In-Ears
- Keep a Limiter in Mind: Budget bodypacks like the P2 have internal volume controls, but they don't feature expensive built-in brickwall limiters. To protect your hearing, always start with your P2 volume knob at zero before turning on gear, and ask sound engineers to avoid hot-plugging mic cables while you are wearing your ears.
- Break One Ear Out? (Don't Do It): When first transitioning to IEMs, it’s tempting to pull one earbud out to hear room ambiance and crowd reactions. Doing this forces you to crank the volume on your remaining earbud to compensate, leading to hearing fatigue. Instead, keep both ears in and ask for a slight room mic bleed or leave ambient gaps in your mix.
- Carry Spare AAA Batteries: The Behringer P2 battery LED turns red when power is low, but keeping two fresh AAA batteries taped inside your gig bag guarantees you'll never get stranded midway through a 3-hour weekend set.
Summary: The Ultimate Budget IEM Shopping List
To get your silent stage monitoring rig up and running for under $100–$150 total, grab these essentials:
- Personal Monitor Pack: Behringer Powerplay P2 (single input) or Powerplay P1 (dual input).
- Multi-Member Distribution (Duos/Trios): Behringer HA400 (4-channel desktop amp) or individual P2 units per performer.
- In-Ear Monitors: KZ ZS10 Pro or Shure SE215 noise-isolating IEMs.
- Cables & Adapters: 15ft 3.5mm Headphone Extension Cable + 1/4" Stereo to 3.5mm Adapters.
By taking control of your stage mix, you'll sing with better pitch accuracy, lock in tight harmonies with your duo/trio partners, protect your hearing, and load out of venues faster than ever.
Already have your in-monitor rig? Why not combine it with a portable set up?
 Adam Khan